Why is My Dosa Soft and Not Crispy? Simple Reasons and Fixes
 May, 5 2025
Your dosa should be wafer-thin, golden, and crisp—but it keeps turning out soft and limp. Super frustrating, right? Trust me, you’re not alone. Even people who’ve been making dosas for years get it wrong sometimes. The good news: there’s usually a simple reason behind the flop.
The number one thing? Batter. Mess up the ratio or fermentation, and you’re left with a pancake, not a crispy dosa. Did you use more urad dal than rice? Or maybe the batter is too thick? Small changes here can totally flip the script.
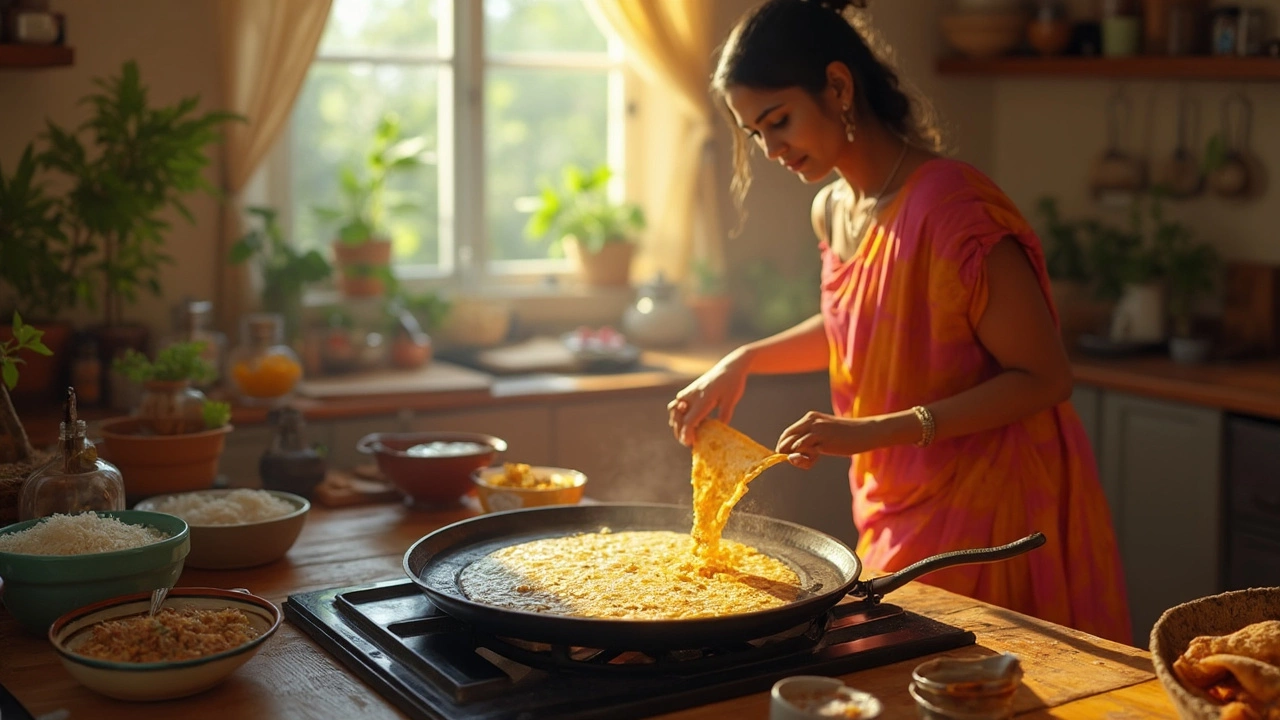
The pan matters, too. Nonstick works, but cast iron is magic for that restaurant-level crunch. And oil isn’t just for greasing—it actually helps create those delightful lacy edges. Scooping batter onto a cool tawa? That’s another big reason your dosa stays soft instead of crisping up nicely.
- What Makes a Dosa Crispy?
- Common Batter Mistakes
- Soaking, Grinding, and Fermentation Tips
- The Right Pan and Oil Tricks
- Spreading and Cooking Techniques
- Quick Fixes for Soft Dosas
What Makes a Dosa Crispy?
Crispy dosas don’t happen by accident. If you’re trying to master the perfect crisp dosa, it’s all about the right balance in the dosa batter, how you handle heat, and your cooking technique.
The first big thing is rice-to-urad dal ratio in the dosa batter. You need more rice than dal—most good recipes suggest around 3:1 or even 4:1. Rice brings the starch that crisps up, while too much dal will keep things soft and floppy. If you ever wondered why restaurant dosas are so crackly, it’s this careful balance.
Fermentation is next. Your batter needs to bubble and double, but if it over-ferments, it can go sour and lose crispiness. Under-ferment, and the dosa comes out pale and flat. Warm spots in your kitchen, or even keeping the batter near a light or oven, can help you nail this stage, especially in cooler months.
Water content matters—a thinner batter spreads easily and gives you those iconic lacy holes. Go easy; if your batter pours like thick pancake mix, thin it with water. The surface tension actually helps the hot pan create a crunch, not a chew.
Cooking temperature is another hidden hero. The pan (especially a cast-iron tawa) should be hot, but not smoking. Too hot, and batter might burn before it cooks through; too cold, and it steams, staying soft.
- Dosa batter should rest and ferment 8-12 hours for best results.
- Always stir the batter before each use—starch settles at the bottom, so you want to mix it up each time you pour a dosa.
- Restaurants sometimes add a spoonful of semolina (rava) to boost crunchiness. Not traditional, but it works wonders at home.
- Don’t skimp on oil, especially along the edges. Oil not only releases the dosa but fries it crisp.
Check out how ingredients make a difference:
| Ingredient | Role in Crispy Dosa |
|---|---|
| Rice | Makes the dosa crisp and light |
| Urad dal | Adds softness and helps fermentation |
| Poha (flattened rice) | Gives extra crisp and easy spreading |
| Semolina (rava) | (Optional) Boosts crunch in home kitchens |
Keep an eye on these points, and you’ll be well on your way to crunchy, golden crispy dosas every time.
Common Batter Mistakes
If your dosa ends up soft, it's almost always the batter. Let’s break down what usually goes wrong. The usual culprit? Skewed rice-to-urad-dal ratios. For a crisp dosa, you need more rice than urad dal. The sweet spot is 3:1 or even 4:1 (rice:dal). Extra dal adds softness—good for idli, bad for dosa crunch.
Grinding is just as important. The batter should be smooth but not pasty. If it’s too thick, your dosa can’t spread thin and won’t crisp up. Too runny, and it sticks everywhere. Aim for a pourable, pancake-batter-like consistency that coats a spoon but doesn't look watery.
Fermentation is a make-or-break step. If your kitchen is cold or you rush things, the batter won't ferment right—no good pockets of air, and that equals a limp soft dosa. Mark my words: well-fermented batter is key for those lacy, crispy dosa edges.
- Using old or low-quality rice? That makes a difference. New rice has more starch and gives a better crunch, while aged rice goes gummy.
- Insufficient soaking? The rice and dal need at least 4-6 hours to soften up before you grind.
- Salt matters, too. Add it after fermentation. Too early, and the bacteria don’t multiply as well, leaving you with a flat, lackluster batter.
| Batter Issue | Resulting Dosa |
|---|---|
| Too much urad dal | Soft, thick, not crispy |
| Underground rice-to-dal ratio | No snap, chewy |
| Over-fermentation | Sour, holes, breaks apart |
| No fermentation | Tough, pale, tastes bland |
| Thick batter | Hard to spread, not crisp |
| Watery batter | Sticky, tears apart |
Get these dosa batter basics right, and you’re halfway to the best crispy dosa of your life. Miss them, and you end up with something closer to a crepe or pancake than the iconic South Indian classic.
Soaking, Grinding, and Fermentation Tips
Getting crispy dosa starts right at the soaking stage. It's not just about dunking rice and dal in water—timing matters. For most home cooks, you want to soak your rice and urad dal separately for at least 4-6 hours. Any less, and your dosa batter won’t be smooth enough for crisp results.
The kind of rice you use isn’t random. Go for short-grain or parboiled rice. Basmati sounds tempting, but it won’t give you that right texture. For the urad dal, whole or split work, just make sure it’s fresh. Old dal can mess up fermentation from the get-go.
Now, grinding. Don’t rush it. Use as little water as you can get away with. If your batter’s runny, you won’t get a crisp dosa. In South Indian homes, people usually use a wet grinder to get ultra-smooth batter, but a good mixer works if you don’t overload it and grind in batches. Your rice should feel slightly grainy once ground, but dal must be silky smooth. This mix is key to making dosas crackly and not bendy.
- Soak rice and urad dal separately for 4-6 hours
- Use short-grain or parboiled rice
- Grind urad dal until smooth, rice until just a little gritty
- Keep batter thick—aim for a pancake-batter consistency, not watery
Fermentation is where most home cooks slip up. The batter needs at least 8-12 hours in a warm spot. Too cold? The batter stays flat and your soft dosa refuses to crisp. Too hot? Over-fermentation will give it a weird flavor and poor spread. If it’s chilly in your kitchen, tuck your batter into the oven with just the light on, or next to something warm.
| Stage | Ideal Duration | Temperature |
|---|---|---|
| Soaking | 4-6 hours | Room temp (25-30°C) |
| Fermentation | 8-12 hours | 28-32°C |
A bubbly, lightly sour-smelling batter almost guarantees that proper restaurant-style crunch. If you see no bubbles or it smells off, tweak your soaking times or location next time. Good basics here means your crispy dosa is halfway there before it even hits the pan.

The Right Pan and Oil Tricks
If you want a crisp dosa, your pan (tawa) plays a huge role. Cast iron tawa is the classic choice and still the go-to for most street vendors in India. It gets ripping hot, holds heat well, and helps create that golden, crunchy texture. Nonstick pans work in a pinch, but they’ll never get you the same kind of crispy dosa you find at restaurants because they just can’t handle heat the same way.
Before you even start cooking, make sure your tawa is hot enough. You should see drops of water sizzle and disappear right away when you splash them on. Pour batter only after this—it makes a real difference. If the pan’s even a little cold, you’ll end up with a soft dosa that sticks and never browns properly.
The next thing is oil. Don’t be stingy here—this isn’t the place to count calories. You’re not deep frying, but a little more oil on the pan helps the dosa release easily and get those perfectly crisp edges. Sunflower, refined, or even groundnut oil will all work fine. Stay away from oils with strong flavors that can mess with the taste.
- Lightly grease the tawa before each dosa; use a half onion dipped in oil for a pro move that prevents sticking and helps spread oil evenly.
- Drizzle oil around the edges of the dosa once you spread the batter—this is what gets the edges super crunchy.
If you’re making batch after batch, wipe down the pan with a damp cloth between dosas. This prevents batter from sticking and ensures even browning every time. Here’s a quick glance at how choice of pan can affect your end result:
| Pan Type | Heat Retention | Crispiness |
|---|---|---|
| Cast Iron | Excellent | High |
| Nonstick | Good | Moderate |
| Aluminum | Poor | Poor |
So if your dosa just isn't getting that crave-worthy crunch, swap out the pan, crank up the heat a bit, and don’t skimp on the oil. Small moves like this make all the difference.
Spreading and Cooking Techniques
If you want your dosa crispy and not soft, watch how you spread and cook the batter. This part makes all the difference. The big secret? You need speed, the right motion, and just the right amount of batter. Miss any step, and you’ll get chewy, soft results instead of the crunch you crave.
An iron tawa or a heavy nonstick pan should be hot but not smoking. If it’s too cool, the batter just sits there; too hot and it burns before it cooks. Aim for a sizzle when the batter hits the pan. Here’s what works:
- Pour about ½ cup of batter onto the center of the pan.
- Using the flat side of a small bowl or ladle, start in the middle and swirl it outward in quick circles—really flatten it out so the batter gets thin and even. Thinner dosa, crispier dosa.
- Work quickly. The first few seconds count the most, since that’s when the batter sets.
- Drizzle a little oil along the edges right as it cooks—about a teaspoon is usually enough for an entire pancake.
- Don’t flip unless you’re making a thick set dosa. Classic crisp dosa just needs one side browned nicely.
Want a quick visual? Compare batter thickness and dosa result in the table below:
| Batter Layer | Result |
|---|---|
| Very thin | Very crispy dosa |
| Medium | Soft center, crisp edges |
| Thick | Entirely soft dosa |
So the next time you want that perfect crisp dosa, focus less on flipping and more on how you spread and cook. Fast, thin, and hot—that’s the game plan.
Quick Fixes for Soft Dosas
If your dosa is coming out soft and not living up to that crispy magic, don’t bin the batter just yet. There are fast fixes you can try right now—no fancy gadgets or hard-to-find ingredients required. Here’s what actually works, based on straight-up kitchen experience and tips from pro home cooks:
- Thin out the batter. Thicker batter almost always equals softer dosas. Add a spoonful or two of water and stir well, aiming for a flowing, slightly runny consistency—think pancake batter, but a little thinner.
- Heat the pan until it’s really hot. Splash a little water—if it instantly sizzles and evaporates, you’re ready. Always pour batter onto a hot, not just warm, tawa or pan.
- Use more oil. Extra oil helps create that crisp dosa texture around the edges. Drizzle a few drops around each dosa right after spreading the batter.
- Spread the batter thin. This isn’t the time for thick, fluffy pancakes. Quickly use the back of a ladle in a circular motion, pressing gently as you go, to get an even, wide spread—as thin as possible.
- Skip the lid. Covering the dosa while cooking traps steam, making it softer. Leave it uncovered for that iconic crunch.
- Check your rice-urad ratio. If you keep ending up with soft dosas every time, next batch add a bit more rice or even a spoon of poha (flattened rice) for extra crispiness.
Not sure if your usual method is on target? Here’s a quick table for the "Gold Standard" dosa batter that most South Indian families use:
| Ingredient | Proportion |
|---|---|
| Raw Rice | 3 parts |
| Urad Dal | 1 part |
| Fenugreek Seeds | ¼ tsp for every cup of dal |
| Water | As needed (for pouring consistency) |
Still wrestling with softness? Sometimes last-minute panic can be solved with a tiny pinch of rice flour, mixed right into the batter before making dosas. It’s not a tradition, but it works in a pinch for crispy dosa edges. And don’t forget—avoid stacking hot dosas. Steam gets trapped and turns even the crispiest dosa limp. If you want to serve a crowd, space ‘em out on a rack or plate.
